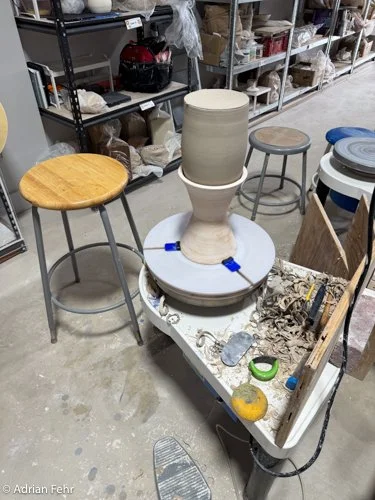
Reclaim (your) Clay

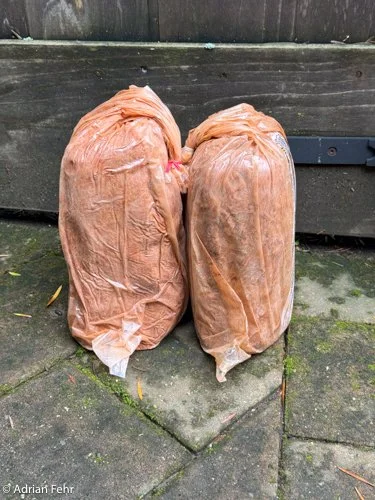
42 pounds of recent reclaim, wedged and ready to throw, instead of in the garbage
Why Reclaim?
Reclaiming clay is the process of returning unfired clay to a ready-to-use state, whether for handbuilding or wheel throwing. So, why is reclaiming important, you might ask? Here is why (and how!) I reclaim:
Reduce waste. Unless your studio has a dedicated reclaim program including staff and likely a monstrous pug mill for mixing/forming, then any scraps, slips, and leftovers from classes are likely thrown away. There might be a bag of “nice” clay that gets turned into instructor balls, but most of those hundreds of pounds of leftovers are tossed. You notice the buckets where you put trimmings or failed pots, or the big 50-gal garbage cans for wet clay/slip — those are also just being thrown away. Clay is a natural resource that shouldn’t be wasted as far as I’m concerned, so I try to keep as much of it as I can!
Create new clay bodies. Ever wanted a slightly darker clay, or just the right amount of grog, or a speckle but only 10% of what is usually in “speckle” clay? Well, save your scraps, and add extra known clay with the attributes that you like. I’m always adding electric brown, speckled buff, charcoal, and the like to my reclaim to give a richness to the fired vessel.
Create without fear! This is the biggest one for me since I can push myself and the clay to our respective limits without being afraid of messing up and wasting the clay. If I collapse a piece while learning, that’s perfectly fine — it just gets reclaimed and comes back for another go at the wheel! I see a lot of potters who stay small or thick, because they are afraid of practicing things that are likely to fail. Reclaim removes that barrier!
So why doesn’t everyone reclaim? Well, it takes time and effort and space, the results may not be predictable or consistent, and it is certainly easier to just buy another bag of pristine, pug-wedged clay and be throwing the next minute.
But if you go through a lot of clay, and especially if you like big feet (lots of trimming!) then maybe making a reclaim setup is right for you!
Aside: I like the end-to-end craft of ceramics so I always wanted to reclaim for the reasons above. At the same time I was interested in wild clay (see my blog post here), and needed a way to manage that process, and well, reclaim mostly overlaps with making wild clay. So I borrowed techniques from Wild Clay (Levy, Shibata & Shibata, 2022) and Handbuilt, A Potter’s Buide (Weiss, 2019) and went to town.
Reclaiming Clay Overview — how I do it!

Collect your clay — any reasonably clean green/unfired clay that is at your desired cone (say cone 5). It can be slip-py wet, throwing consistency, leather hard, all the way to bone dry.
Shred the clay by forcing it through a 1/4” welded steel grate into a bucket of water. This ensures that everything will absorb water evenly and be mixable. Dry clay might need to be pre-moistened. The main thing is to avoid hard-to-mix lumps. I’ve also been given bags of student clay that had sponges and even tools in them!
Add water to cover plus ~10%, and let sit for at least a day. This allows the clay to hydrate evenly and get ready for turning into slip (watery liquid clay).
Mix it up thoroughly using a paint mixer attachment on a strong drill. Those little chunks of hydrated clay are still chunks of clay, and need a really strong mixing! Do this for at least 5-15 minutes until the lumps are gone and the clay is even, adding water as needed to get a pourable but thick slip. By hand doesn’t count — use a powerful drill and a paint mixer attachment.
Filter the slip through a window screen-scale filter. This ensures nice even clay, and removes nasties like hair, twist ties, and big grit.
Pour your new slip onto a drying board and cover with a thin breathable sheet. The drying board can be plaster bats, sheetrock, or even plywood. Construction details are below!
Wait … for days to weeks depending on the weather, drying board type (plaster and sheetrock suck moisture out faster than non-absorbant materials), starting moisture, etc.
Mix and wedge. Once the clay is getting towards the right dryness, I cut and stack pieces that will fit in a bag and let the moisture equilibrate for 1-2 days. You can add or remove moisture as needed, but I keep my clay softer, wedge it well to remove air bubbles, and then dry further to desired consistency.
(Optional) Test it … yes, I said it. If you mix different clays together, you aren’t guaranteed to get a clay with similar properties. I always make test tiles to check color, glaze reactivity, and clay properties, and fire them on drip catchers just in case. Or you could just go for it.
Use it!!!
Reclaiming Clay — the long version
1 Collect your clay — any reasonably clean green/unfired clay that is at your desired cone (say cone 5). It can be slip-py wet, throwing consistency, leather hard, all the way to bone dry.
Any green clay should yield a usable reclaimed clay body. That said, there is some chemistry happening when you mix clays that will impact how the clay throws or absorbs water, and also how it fires and interacts with glazes. That said, in my limited experience with around a dozen batches of reclaim and wild clays mixed with commercial clays, I’ve always gotten usable clay bodies that fire at about the right temperature without unexpected results (bloating, melting, etc.). My main principle for reclaim is to always use clay bodies that vitrify at the same cone. At Merritt Ceramics in Oakland, we use cone 5 exclusively so I only use cone 5 clay in my reclaim.
Aside: tiny clay particles in your water bucket don’t settle quickly as opposed to the dense handful of clay, so I always save the bottom third of throwing water that includes both the big/heavy stuff and also a high concentration of the small particles. I’m not sure how big a difference it makes since that big lump of clay is made of tons of tiny micron-scale clay particles and the water just has them settling, but that’s what I do. I also save the hardpan from porcelain.
Pick clay that combines properties that you like! Do you like darker clays, or some speckle? Enrich your reclaim with at least some clay with those properties. My regular reclaim has some sparkle, a nice rich light brown color, and medium grog.
Oh, but that is my regular reclaim. I also have a white porcelain reclaim with mostly Nara and Frost porcelain. I keep this reclaim completely separate from the regular stuff, and make sure that buckets, sieves, boards, etc. are extra clean when working with super white porcelain reclaim! If you have two main clay bodies, consider two reclaims and tailor each to what you love!
Yes, trimmings, pots, floor sweepings, all end up in my reclaim! (I do sweep the floor before trimming too to reduce nasties.)
2 Shred the clay by forcing it through a 1/4” welded steel grate into a bucket of water. This ensures that everything will absorb water evenly and be mixable. Dry clay might need to be pre-moistened. The main thing is to avoid hard-to-mix lumps. I’ve also been given bags of student clay that had sponges and even tools in them!
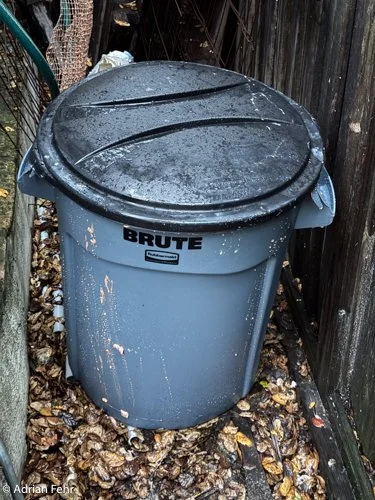
So this is where you need to figure out your batch size. I started taking home 1 gallon buckets of trimmings/scraps until I had 4 gallons in a 5 gallon bucket. Then I shredded the clay into another 5 gallon bucket. This was easy to handle, not too heavy, didn’t take up too much space, and was quick to process.
Now I collect clay in a 44 gallon plastic garbage can, shredding it when it goes in. I’m never processing more than 10-20% of the clay at a time, so the leftover creates consistency between batches. Whenever I need more clay, I just take 4-5 gallons out, and leave the rest for the future.
Shredding. Do I have to?! No, but yes, you really should. My reclaim can be trimmings, or an entire pot, or a bone dry lump. These will make mixing next to impossible if the clay is not already hydrated and shredded. So you can mix for days, or shred your clay. Just saying.
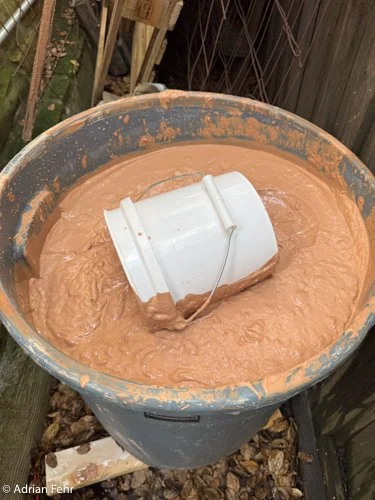
I use a 1/4” welded steel sheet from the hardware store (think landscaping grate or fencing) and bent it to fit the opening of the 44 gallon bucket. Nothing fancy. Oh, and I shred INTO water already in the bucket. The water helps keep the shreds separate and starts hydrating immediately.
3 Add water to cover plus ~10%, and let sit for at least a day. This allows the clay to hydrate evenly and get ready for turning into slip (watery liquid clay).
Adding water makes the clay more runny and easier to mix and filter, but then takes longer to dry. Too much water also means that it will run off the drying boards. So there is a balance where it is easy to mix and pour but still holds its structure well enough to stand up decently on whatever boards you use. Experiment and see what works for you!

Hydration is key for getting uniform clay especially if some clay is very hard and some is already slip!
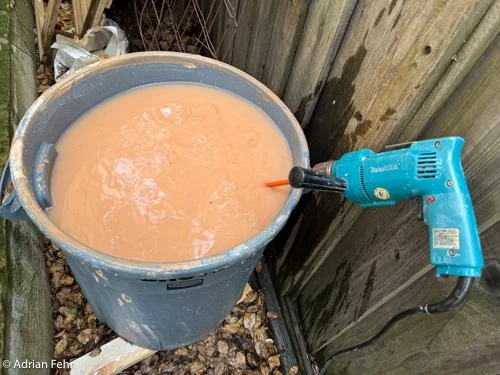
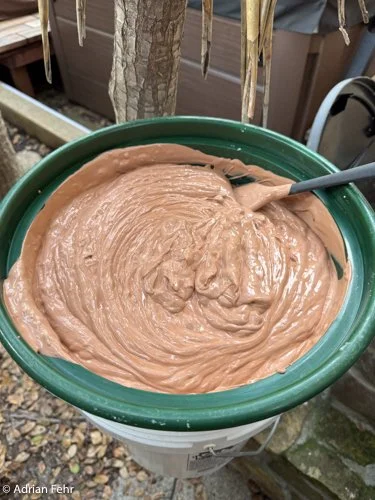
4 Mix it up thoroughly using a paint mixer attachment on a strong drill. Those little chunks of hydrated clay are still chunks of clay, and need a really strong mixing! Do this for at least 5-15 minutes until the lumps are gone and the clay is even, adding water as needed to get a pourable but thick slip. By hand doesn’t count — use a powerful drill and a paint mixer attachment.
You’d destroy yourself doing this by hand, or burn up a little drill, so make sure you invest in a heavier 1/2” or hammer drill if you are doing decent size batches. This old Makita has two handles for extra support and safety.
The paint mixer attachment should also be pretty beefy. Mine is old and missing paint, but tough as nails. Something like this. It doesn’t reach the bottom of the bucket — not ideal — so I also use a wooden paddle to churn clay up a bit.
IMPORTANT: never put your fingers in the mixing bale if the drill is plugged in! These drills won’t even notice as your fingers are mangled, and even bumping the trigger can get it going enough to injure you badly. Yes, there is some clay stuck there or a stick. Unplug, then clean, always! Be safe!
Mix up and down, at an angle, trying to get to the bottom. Do this for at least 5-15 minutes until the lumps are gone or almost gone and the clay is even. Add water as needed to get a thick but pourable slip. This is the most important step to me for getting good uniform reclaim.
Stating the obvious, cleaning your paint mixer while the clay is wet is fast and easy, as opposed to after it has dried. I use the jet setting on a garden hose sprayer in a 5-gal bucket, and the water can go straight back into the reclaim bucket after you take out your clay.
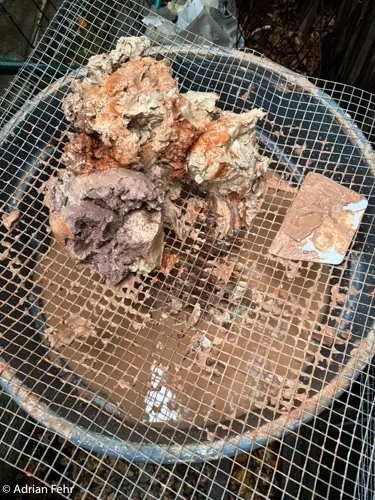
5 Filter the slip through a window screen-scale filter. This ensures nice even clay, and removes nasties like hair and big grit.
Clay is made of tiny micro-scale particles, so in theory you could filter it to a very fine level. But fine filters clog and are slow to use, and I like a little grit anyway. For me, this step is NOT about filtering out grog or fine particles. It is about filtering about studio contamination suck as hair, twist ties, the occasional leaf. For this purpose, a window screen is more than sufficient!
Gold prospecting sieves fit right onto 5-gal buckets and come in a variety of mesh sizes. I use a 1/20” sieve for this step and force the clay through the sieve with a rubber spatula or a rib.
A mostly-full 5-gal bucket is about the right amount of slip for two 2’ x 2’ drying boards so that’s what I usually do.
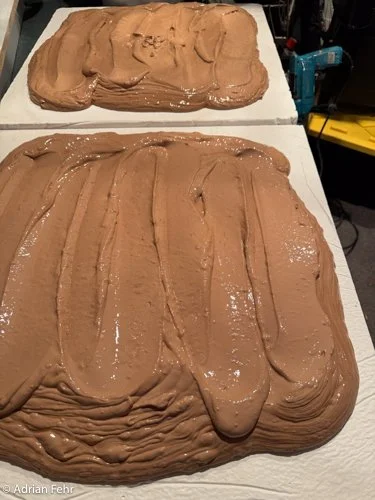
6 Pour your new slip onto a drying board and cover with a thin breathable sheet. The drying board can be plaster bats, sheetrock, or even plywood.
The goal after adding water to make slip is now to remove water and turn the slip into throwable clay. What a hassle!
Two things make this easier. 1. Large surface area means that evaporation or absorption happens faster. 2. Some materials are highly absorbent and can also accelerate this process. Here are two approaches:
Canvas / sheetrock / plywood workboards. Hardware stores sell “repair” pieces of sheetrock and plywood, that measure 2’ x 2’. Buy two of each, and a 6’ x 8’ canvas dropcloth. Cut the dropcloth into two 3’ x 3’ sections and spread them out on a work surface. Put the sheetrock on next, then the plywood. Wrap the canvas up and over the plywood, fold over the canvas edge to make a strong multi-layer rim, and staple the canvas onto the plywood. You now have two workboards with absorbent sheetrock protected on the top by canvas, and for handling by the plywood. These are also awesome for handbuilding on, and sponge/spray down easily. Just set them in the sun to dry.
Plaster bats. I started with the above workboards, but they don’t pull water out as well as plaster bats. Plaster is the stuff you played with as a kid (probably Plaster of Paris), and it is easy to work with and hardens into whatever shape you cast it in. I bought a 50 pound bag of USG Pottery Plaster No. 1 locally, used 2x4’s to make a 2’ x 2’ form and lined this with plastic. I wanted 24” x 24” x 2” bats so I used the Glazy calculator to tell me how much water and plaster to use. Keith Simpson method: 12,672 g water and 18,103 g plaster. Water should be room temperature. Sift plaster through 1/8” filter into water. Slake (soak) plaster for 3 minutes. Mix for 3 minutes with paint mixer. Immediately, gently pour into the form in circular pattern and smooth out. Let harden for 1 hour. Repeat for bat number 2! Allow to dry for 1 week and trim off any non-uniformities.
NOTE: if using plaster bats, it is critical not to get any plaster bits or chunks in your reclaim! Plaster will not feel good for throwing, but more importantly, it does not shrink the same as clay and can cause cracking or explosions when fired. It’s not hard to be careful about this, but make sure you don’t contaminate your reclaim!
It was rainy when I did this last batch of reclaim so these boards in the photo are uncovered in a storage room. If you dry your clay outside in the sun and there is a risk of leaves or dust, then I cover them with a light cotton sheet.
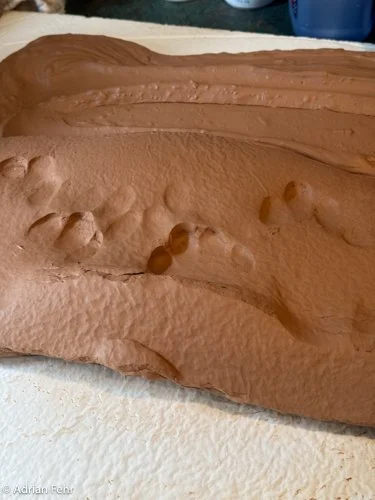
Back to surface area: taking the corner of your plastic rib and carving deep “V” stripes into the reclaim further increases the surface area and speeds drying!
7 Wait … for days to weeks depending on the weather, drying board type (plaster and sheetrock suck moisture out faster than non-absorbant materials), starting moisture, etc.
Testing the doneness of the clay. It is trial and error, touching and poking, and personal preference of when to stop.
8 Mix and wedge. Once the clay is getting towards the right dryness, I cut and stack pieces that will fit in a bag and let the moisture equilibrate for 1-2 days. You can add or remove moisture as needed, but I keep my clay softer, wedge it well to remove air bubbles, and then dry further to desired consistency.
The clay will now feel too dry in places and too wet in the center, so you stop drying when the Average is close to here you want it. If I made V grooves in the clay, then it is easy to break the strips apart, stack them together, compact them by smashing onto a work surface, and bag them to let moisture redistribute.
The clay is now ready for wedging. This is what the pug mill would do for you if we had one, but otherwise it is old-fashioned elbow grease. There may still be uneven clay, and almost certainly lot of bubbles, so extra wedging to get everything even is critical before use. Take your time, learn to spiral wedge — or hone your technique! — and remember your ergonomics, and you are soooo close!
Speaking of ergonomics, I find it easier on my body to wedge clay that is softer than I want to use it, especially if I’m getting out air bubbles and getting it nice an even. Be nice to yourself!
9 (Optional) Test it … yes, I said it. If you mix different clays together, you aren’t guaranteed to get a clay with similar properties. I always make test tiles to check color, glaze reactivity, and clay properties, and fire them on drip catchers just in case. Or you could just go for it.

Three reclaim test tiles, each showing raw clay on left and glossy clear on right
10 Use it!!!
You know what to do — have fun! =D
As always, give me a shout if you have questions or thoughts or suggestions. And follow me on social media if you want more adventures in clay!